I figured out a simple way to add raised images to book covers.
You will need:
a design that can easily have yarn glued onto it, big shapes (henna images are too small).
linen yarn, twine or something similar. (I used the kind that comes on a cone and usually makes wash cloths).
book board, davey board, chip board. (chip board is the cheapest...)
a brown paper bag (clean)
acrylic paints, at least 2 contrasting colors. (mine are phlalo blue and hunter green mixed with metallic copper highlights).
paint brushes and palette (lid to a zip lock container works for me, when paint is dry it's easy to peel off).
a paper towel
PVA glue and some water (archival bookbinder's glue, won't crack when bent; you can also use tacky glue for less than a future museum piece)
a cup of water for your paintbrush
a plastic squeeze bottle with a pointy tip for glue: Like This, you can find these at any craft store.
scissors to cut up the yarn
a brush for the glue (foam or paint is fine)
a bone folder
Other examples:
Transfer your image onto the book board, this part is up to you. I found some images in a book called Totally Tangled, I was trying to see how intricate I could make the design. Using a sharpie which is about the thickness of the yarn I just kind of eyeballed it.
Start gluing the yarn onto the lines of the image with your squeeze bottle so you get a fine line. You will get glue on your fingers, wipe it off and keep going, the yarn will sometimes pull up sticking to you, this is normal.
It can take a long time if your image is intricate. I tried some geek images with embroidery floss but that didn't work out. Don't even waste your time.
Once completely glued down brush some watery glue over the whole thing. This will stiffen all of the yarn that didn't touch the glue lines. Let it dry completely.
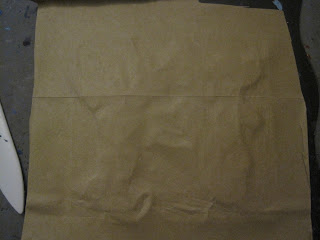
With the paper bag, cut a piece a few inches bigger than your book board. I tried to stay away from the creases in the paper but eventually learned that it doesn't really matter as you will burnish it all out.
Put glue absolutely everywhere and in all crevices of the yarn. I drizzled it on with the bottle and then brushed more onto the cardboard.
Put your piece of paper bag on top and smooth over with your hands. The paper can tear at first so you have to gently and slowly work it in. Push down the outside of your image.
You can see the design start to emerge. Burnish it with the bone folder even more. Resist the urge to pop the pockets of glue, it will not look good.
At some point you can glue down the outside edges of the paper and then continue burnishing the image. This is what it looks like all finished. Let it dry completely.
I painted it with a combination of dark blue and dark green. Make sure you cover the entire surface, around the sides and a bit on the underside as well. Let it dry.
I took some metallic copper and a paper towel once the blue/green was dry and wiped it all over the design.


Amazing!
ReplyDeleteThanks Beth I think this might work for my book edition.
ReplyDelete