Monday, January 31, 2011

Upgrades


I got this howling wolf at the moon dreamcatcher for Christmas and decided to improve it. The former beaded feathers are mini dominos with images of the tardis glued on.


This is my new clock. The old one was  $3 cheap one from Walmart. I found some art board and after drilling a hole made this. I wanted some cute flowers but they reminded me of something...

Thursday, January 20, 2011

Make: Electronics

I want to make this: Tron El Wire Bag and I can buy a kit for $20, or the indiviual components for a bit less.


 And then I read on the Make Blog that someone has done every single experiment in their electronics book: Make Electronics. I got this book for my birthday off my Amazon wishlist and have gone through it but haven't done anything yet. I still have a decent breadboard and some leds, resistors, capacitors, etc so I have the stuff, minus the El Wire. I have to do this, every single experiment in the book, I can do it but it will probably take more than a year.

When I took my first Physics lab class and we got into this stuff I immediately went home and took apart my hairdryer and toaster and headphones and so much other stuff to scavenge for parts. It's probably good I don't do that any more.

Tuesday, January 18, 2011

Embossed Book Cover

I figured out a simple way to add raised images to book covers.

You will need:
a design that can easily have yarn glued onto it, big shapes (henna images are too small).
linen yarn, twine or something similar. (I used the kind that comes on a cone and usually makes wash cloths).
book board, davey board, chip board. (chip board is the cheapest...)
a brown paper bag (clean)
acrylic paints, at least 2 contrasting colors. (mine are phlalo blue and hunter green mixed with metallic copper highlights).
paint brushes and palette (lid to a zip lock container works for me, when paint is dry it's easy to peel off).
a paper towel
PVA glue and some water (archival bookbinder's glue, won't crack when bent; you can also use tacky glue for less than a future museum piece)
a cup of water for your paintbrush
a plastic squeeze bottle with a pointy tip for glue: Like This, you can find these at any craft store.
scissors to cut up the yarn
a brush for the glue (foam or paint is fine)
a bone folder

Other examples:


Transfer your image onto the book board, this part is up to you. I found some images in a book called Totally Tangled, I was trying to see how intricate I could make the design. Using a sharpie which is about the thickness of the yarn I just kind of eyeballed it.

 Start gluing the yarn onto the lines of the image with your squeeze bottle so you get a fine line. You will get glue on your fingers, wipe it off and keep going, the yarn will sometimes pull up sticking to you, this is normal.


It can take a long time if your image is intricate. I tried some geek images with embroidery floss but that didn't work out. Don't even waste your time.

Once completely glued down brush some watery glue over the whole thing. This will stiffen all of the yarn that didn't touch the glue lines. Let it dry completely.


With the paper bag, cut a piece a few inches bigger than your book board. I tried to stay away from the creases in the paper but eventually learned that it doesn't really matter as you will burnish it all out.

Put glue absolutely everywhere and in all crevices of the yarn. I drizzled it on with the bottle and then brushed more onto the cardboard.


Put your piece of paper bag on top and smooth over with your hands. The paper can tear at first so you have to gently and slowly work it in. Push down the outside of your image. 


With a bone folder go over the outside of your image and then the insides. Go over them again and again. And then a few more times. This one piece took about an hour.


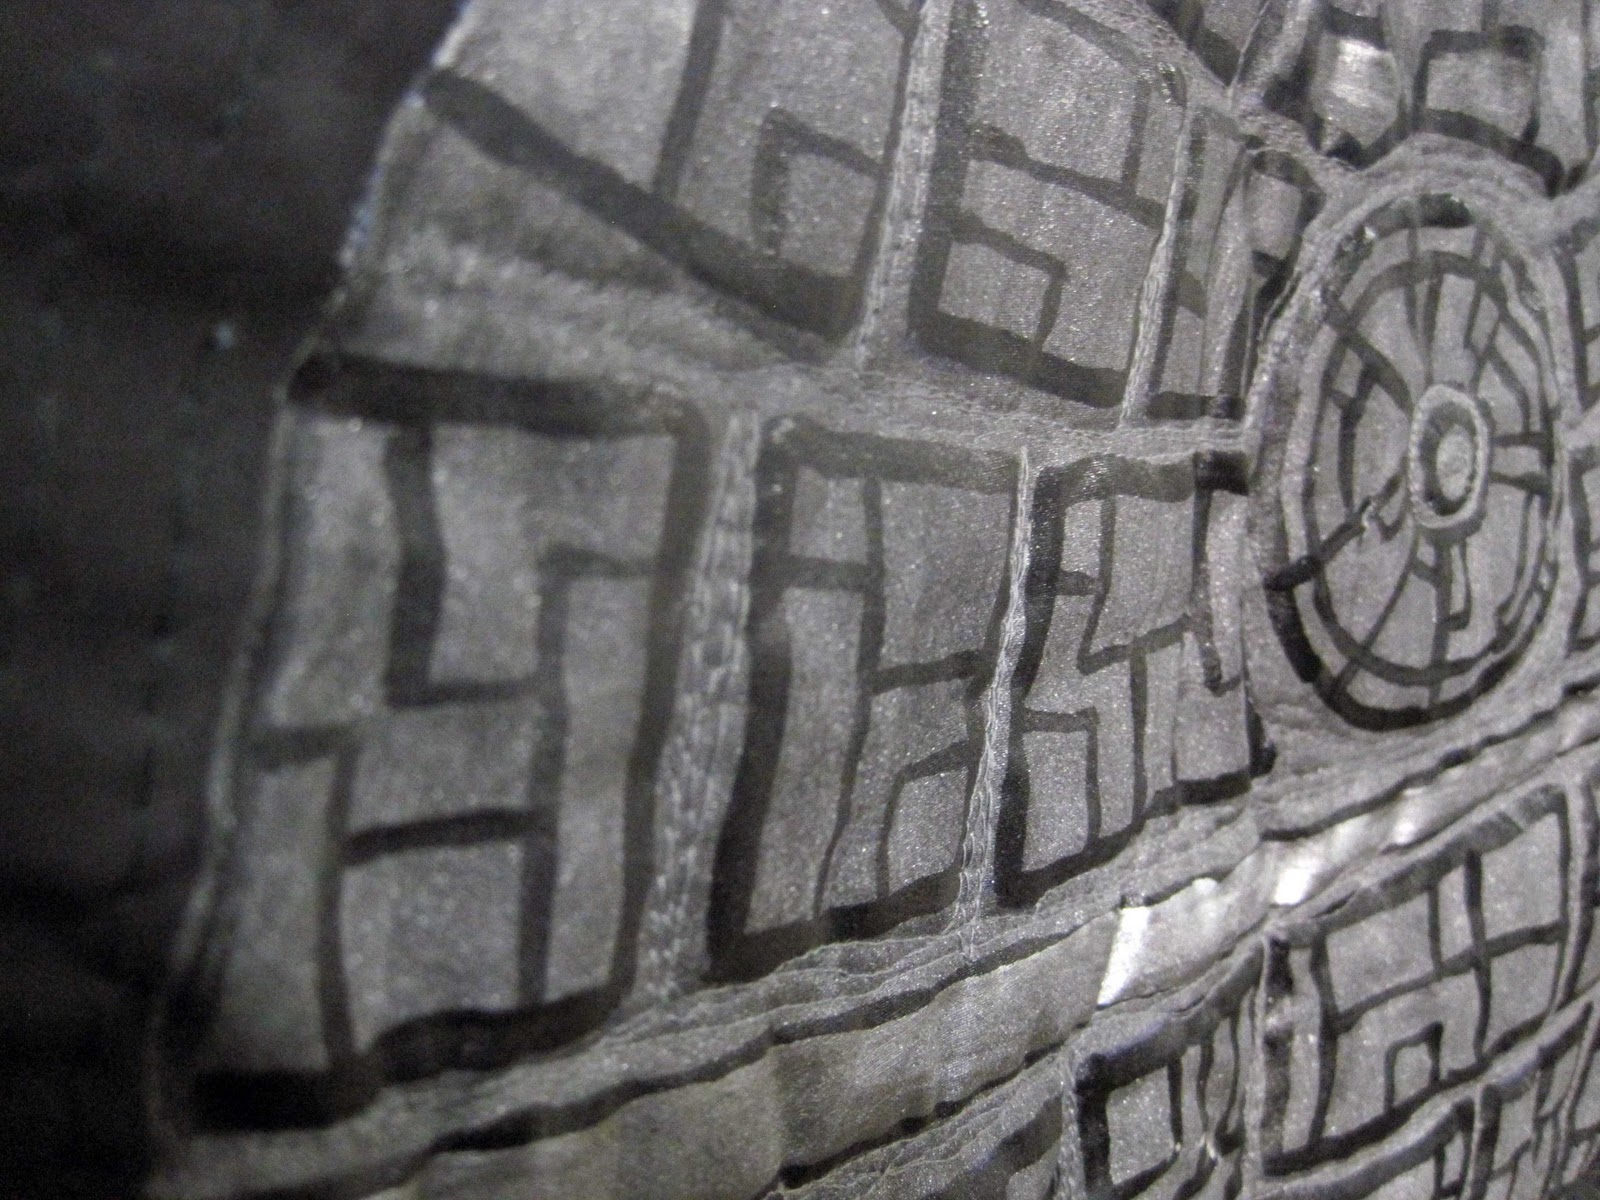
You can see the design start to emerge. Burnish it with the bone folder even more. Resist the urge to pop the pockets of glue, it will not look good.


At some point you can glue down the outside edges of the paper and then continue burnishing the image. This is what it looks like all finished. Let it dry completely.

I painted it with a combination of dark blue and dark green. Make sure you cover the entire surface, around the sides and a bit on the underside as well. Let it dry.


I took some metallic copper and a paper towel once the blue/green was dry and wiped it all over the design.


I did a a coptic binding with some art and handmade papers.

Monday, January 10, 2011

The Baby Quilt

 When I get a new niece or nephew I like to make a quilt or an afghan This is for my niece Lily. When I started all I knew was that I wanted the Death Star in it. The rest just kinda happened. It's all acrylic painted fabric and I pieced it together and then quilted it. I've added some close ups so you can see what passes for quilting on my sewing machine.


The Break: Making Lots and Lots of Stuff

I have been dying to learn cord binding and am having no luck with anything on the internets. I did find a video tutorial on embossing simple designs onto leather bound books and that was close enough. These are actually upcycled. I got some kid's board books from the library when they were giving them away. I peeled off the shiny parts and then took a sharpie and drew an image onto both pieces. I then took some linen yarn and glued it onto the lines and after brushed on some watery glue. When completely dry I brushed on more glue and placed a cut up brown paper bag piece on top. Over about 45 minutes to an hour I burnished the image with my bone folder again and again. I would push out the centers and then up against the sides until it was dry enough to take the shapes. This is the front and back covers for books not yet bound. Each one took the almost full hour. When that was dry I painted on several layers of acrylic paint. Lots of work but completely worth it.


This was my 2nd attempt at embossing designs onto a book cover and then completing the book with longstitch binding: 


This next group are done with polymer clay I stamped randomly, baked and then painted. I used my tear bar paper deckler to makes the pages wavy.


My coworker let her boyfriend decorate his office with Star Wars toys. I offered a painting and did this one, which was supposed to be a 'warm up' for some other painting projects. This was no warm up, it was a bit more work than I'd planned. Darth Vader is completely black and the only way you see the contours defined is by their reflection off the differently shaped surfaces. I'm working on another one and it's still really difficult so I may need to practice a few times before I go back to the canvas.


I got a book from the library, Fashioning Technology: A DIY Intro to Smart Crafting  and found a project I thought would be doable and inexpensive. I have 2 window benches and needed a new coffee table. I glued some plywood to the top of one bench and then painted it navy blue. I found some stencils I liked and tried to stencil photosensitive paint but it kept coming out messy. After several tries I did what the book told me to do, I made a silk screen. I went to the art store and bought some emulsion and activator. I found an old polyester curtain and a picture frame and stapled the fabric to the frame. I painted the photo-mixture on both sides of the screen and left it in the darkened bathroom to dry. I then found a piece of plexiglass and stenciled my original image in black onto the glass and let it dry. Once both were ready I put the plexiglass on the screen and both on a black cloth and left them outside for a few hours. Then I rinsed off the screen and put the paint on the table this way. I also added more images with a regular paint brush. When I have something on the table that portion isn't as glow in the dark but with with lights out it does glow. I can only hope it freaks my cat out.